.png?width=256&height=60&name=Logo%20(1).png)
This guide is designed to support training supervisors as they deliver VR-based classroom training sessions using the Pixaera platform. Follow these step-by-step instructions to prepare your environment, onboard trainees, and ensure successful training delivery.
1. Prepare the headsets
- Make sure to have the Pixaera app installed on all devices you’re bringing to the training facility. Also ensure that all required modules are pre-downloaded on all devices prior to the training date. For step-by-steps instructions follow the instructions here.
- Charge all devices in advance and make sure to turn them off to preserve power. You can do that by holding down the power button for at least three seconds until the indicator light turns off and you hear the power down chime.
- Inspect the training site beforehand to confirm good internet access. In case of weak connection, consider bringing a dongle or using your mobile device as a hotspot for the Oculus Quest 2. You can also purchase sessions to use the app in Offline Mode.
- Make sure there is enough room for all devices being set up in the space. We recommend arriving an hour or two earlier to connect the headsets to the internet and configure stationary boundary for each headset. For tips on how many headsets you can set up in a specific space, read here.
- It’s critical that you go through steps 2 to 4 below to familiarize yourself with the process prior to facilitating any training. Complete a few modules then test the whole process on one or two new users to ensure that you are ready.
2. Pre-training instruction
When conducting a training session, it is beneficial to begin with a formalised VR induction at the beginning to run through key practices for VR conduct for the trainee, granting them the opportunity to understand what they expect to see and how to navigate the headset as well as within a module. Please see the example deck below:
- Ask the trainee to wash their hands, face and ears thoroughly with soap and water right before training.
- Pass both controllers to the trainee and make sure that they get familiar and comfortable with the grip.
- Explain that they will only be required to use the trigger button on either hand, whichever they’re comfortable with. Get them to interact with the trigger button a few times before taking away both controllers and storing them away safely.
- Expand one of the following categories based on the intended authentication method. Ensure that the trainee(s) are aware of the content before wearing the headset.
Trainee login options
If using VR PIN:
- Guide trainees to sign in by hovering over numbers and pressing with the trigger.
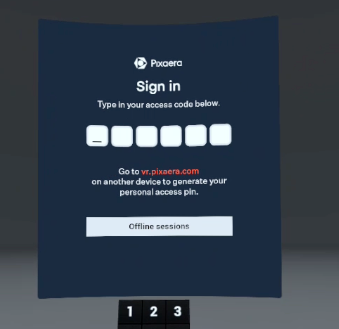
- Instruct them to hover over a module in the main dashboard and press Start to launch.
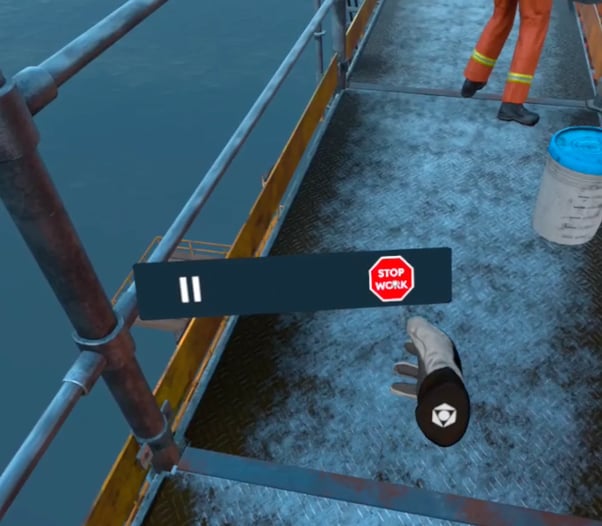
- Point out the Stop Work button (red icon) for interventions.
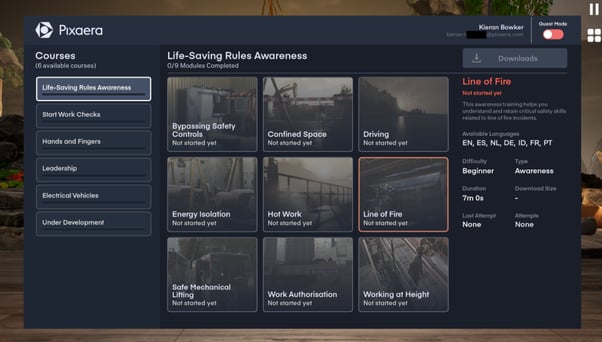
If using Guest Mode:
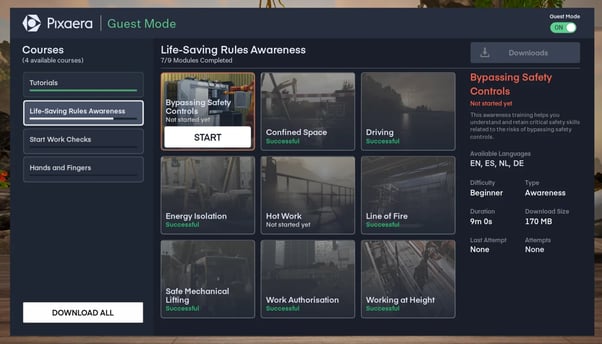
- Show trainees how to start a module from the main dashboard – hover over any of the module tiles and press the ‘Start’, or ‘Retry’.
- Once a module is selected, another pane will appear to type in the user’s First Name and Last Name (and if necessary, their Employee ID, although this can be an ID as appropriate).
💡 Consider entering this info yourself before handing over the headset to the trainee.
- Highlight the red icon to the right of the menu bar – the ‘Stop Work’ button. Instruct trainees to use it whenever they feel like there is something they need to intervene on.

If using Offline Mode:
- The trainee will navigate as usua l— ‘Start’ button and ‘Stop Work’ icon work the same.
3. Starting the training
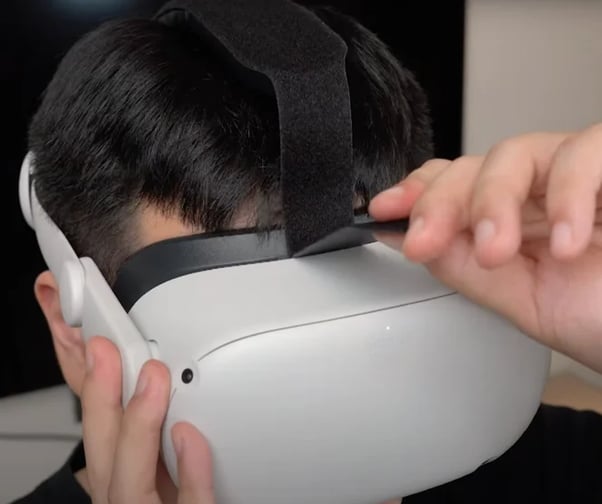
Help trainees properly fit the headset:
MetaQuest VR
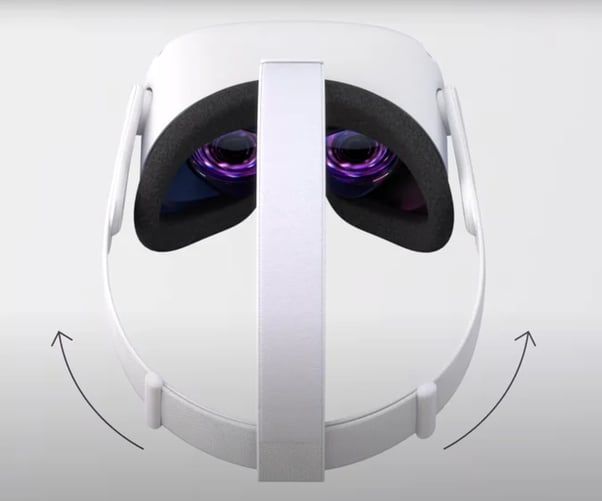
- Adjust the side straps
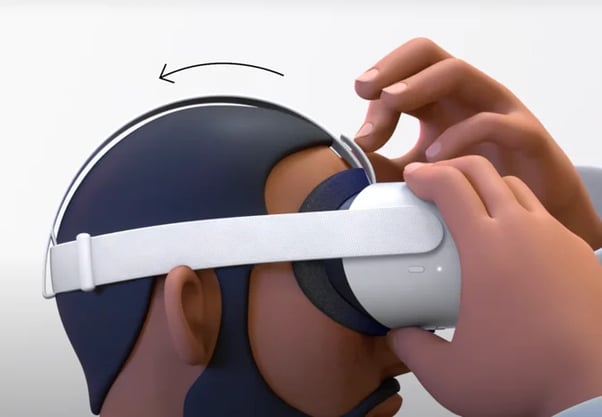
- Put on the headset and adjust the top strap
- Improve the clarity by gently moving the arms on either side of the headset up and down. To adjust the angle of the headset against your face.
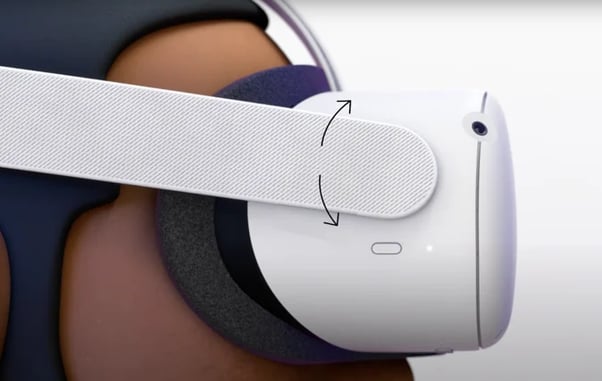
You’ll know that the headset is worn correctly when it’s resting lightly on your face, and the picture appears clearly.
KIWI Elite Straps
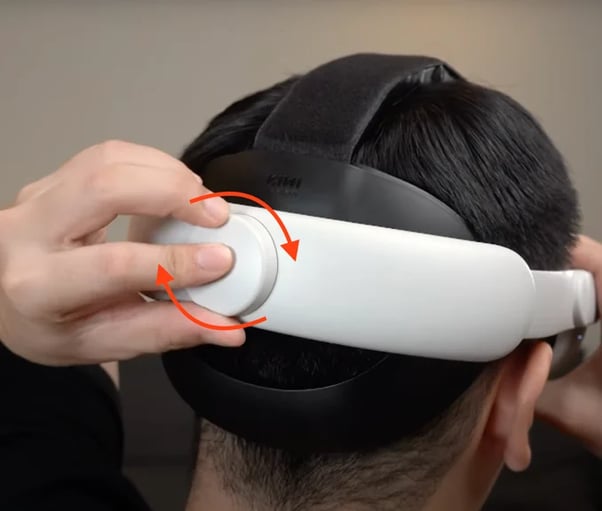
- Place the headset on and tighten it until it’s snug on your face by rotating the knob clockwise.
- Detach the top strap, adjust the setting and re-attach it when it feels comfortable and snug on your face.
You’ll know that the headset is worn correctly when it’s resting lightly on your face, and the picture appears clearly.
When the trainee confirms that the headset is comfortably secured, hand them each controller while announcing which controller they are about to handle (i.e. left or right).
Ensure that the trainee is facing the right direction (i.e. the sign in screen if they’re signing in via VR pin, or the main dashboard or the module resume screen).
- If it’s asking them to set up the guardian/stationary boundary, take control over the headset and set it up yourself before giving it back to them, repeating the previous steps.
- Alternatively, feel free to guide them through the process of setting up a stationary guardian yourself.
- If they can see the environment but don’t see the main menu, announce what you’re about to do then press and hold the Oculus button for 2 seconds to reset the view.
Guide the trainee and make sure that they have started the module and can see the correct surroundings related to the module they selected.
🎧 Optional for loud environments: Advise the trainee that you will place headphones on their ears. Ensure that a fresh set of sanitary covers is secured over both ear pads. Plug in the auxiliary cable into the slot found on the side of the headset. For recommended headphones and accessories, click here.
4. Post-training
After the module is complete:
- Collect and safely store both controllers.
- Unplug and remove headphones if used.
- Remove and sanitize the headset.
- Place the headset on charge.
Launch the survey
Each Pixaera session comes with a standardised survey in the same language as the training. Launch the survey once the session is complete.
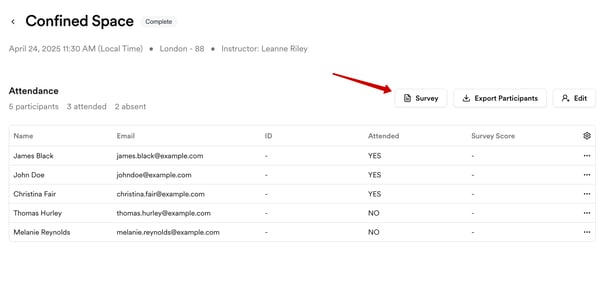
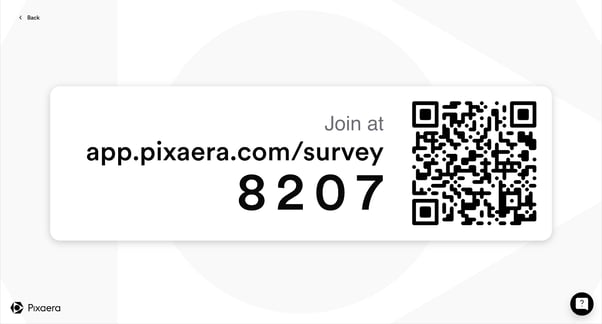
Ask training participants to scan the survey QR-code from their devices and complete it while still in the classroom.
Once completed, you can access the survey results from the dashboard and export them when needed.
